共有回帖数 0 个
-
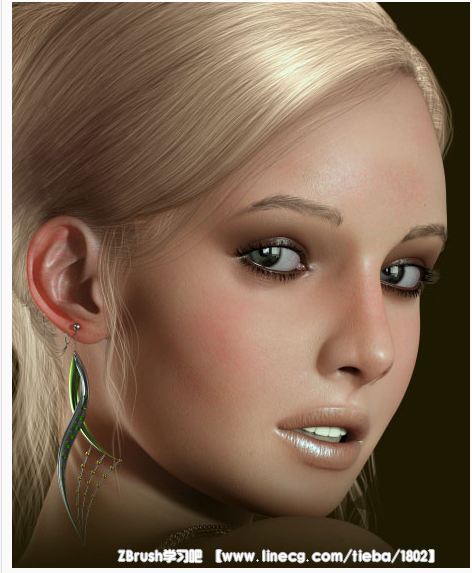
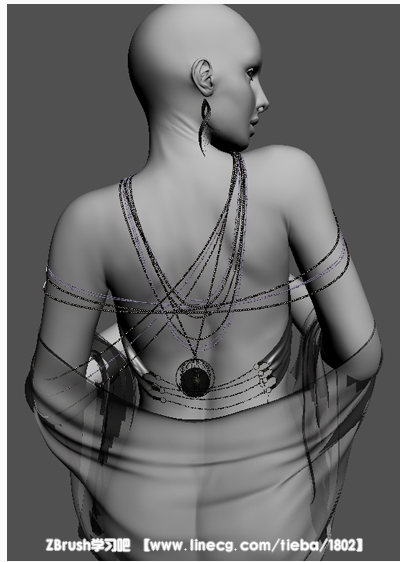
如果自信的说,那么翻译也是没问题的,O(∩_∩)O好了,先来看看效果图先:

Introduction
Everything began when I saw a photo of a leaf placed on a hand. It seemed like such a simple image, but because of the professional lighting, the style, colors or my mood that day, it looked really beautiful and cozy. The green color of a leaf and the color of the skin worked so well, it was very pleasing to watch. So it really boosted my inspiration and motivated me start to develop something of my own.
前言介绍
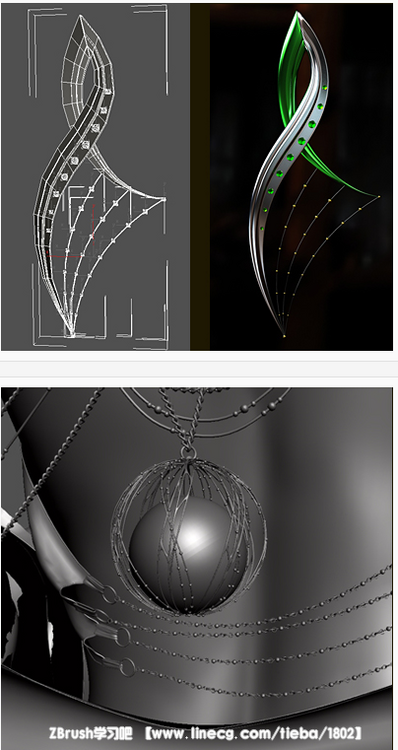
一切开始时,我看到了一只手放在叶子的照片。 这似乎是一个简单的图像,但因为专业灯光,风格,颜色或那一天我的心情,使它看起来真的很漂亮,舒适。 绿色的叶子和皮肤颜色效果很好,看起来非常顺眼。 因此,它确实提高了我的灵感和动机,我开始制作自己的东西。SketchesIt was interesting to start a project with just two colors. I began to splash digital paint around with a simple soft brush picking shades of green and warm light brown, to develop the mood I wanted. When I had something that resembled the mood I was seeking, I knew I should keep moving this way. I knew I wanted to create a girl wearing green. The idea of dressing her up with delicate chains and a big glass ball pendant on her back came to me later. The name 'Open Green' came to me naturally.草图
这是有趣的项目开始只有两种颜色。我开始,用一个简单的软毛刷采摘绿色和温暖的浅棕色,深浅,调整情绪,我想数字涂料周围。当我有相似的心情,我在寻找,我知道我应该继续前进这样。我知道,我想创造一个女孩穿着绿色。打扮精致的链,并在她的背上一个大玻璃球挂件她的想法来到我的脑海。我自然而然取名为"绿色的格林"。

Modeling
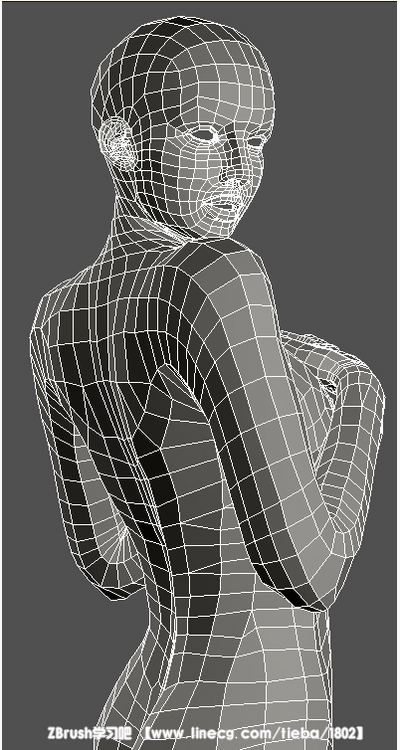
I started collecting references of various girls on the web. In the end I chose one particular image of Adriana Karembeu. She is very gorgeous and I decided I wanted someone that looked like her. I started with my 'default' low poly base mesh which I modify and change to suit my projects.
建模
我开始收集参考网页上的各种各样的女孩。最终我选择了一个特定的形象阿德丽娅娜·伽杭波。她很美丽,我决定我想要一个像她。我开始使用我的'缺省'低多边形的基础模型我修改并更改以满足我的计划。


rigged the model in Biped and started to make the desired pose. After that I began to tweak, change proportions and generally fine-tune the model. This stage was critical and I spent most of the time on it. This part was done on a very old laptop, when I was away on holiday. When I returned home I moved her to ZBrush to complete further anatomical correction. I really wanted to make her look correct, natural and very beautiful.
我七拼八凑的两足动物模型,并开始制作所需的姿势。之后,我开始调整,改变比例大致微调模型。这一阶段是至关重要的,我花了大部分时间在它上面。这部分是用一个很老的笔记本电脑制作,当时我外出度假。当我回家时,我把她转移到ZBrush来完成进一步的解剖矫正。我真的很想让她看起来是正确的,自然很漂亮。
Making cloth falling on her arms was a really interesting part. First I thought of sculpting it, but later I decided to do a video simulation. The main problem was that her body needed to catch that cloth so it would naturally simulate on her.
让布落在她的怀里真是一个有趣的部分。首先我想它雕刻,但后来我决定做一个视频。主要的问题是她的身体需要赶上那布,它自然会模仿她。So I made a morph between the "catch" pose and the original pose, seen here in the video.
所以我做了一个布料变形"捕捉"姿态和原来的姿势比较,在这里看到的视频。

I needed to tweak a lot of morph timing and simulation parameters, but what I've created in the end was natural looking and a perfectly unwrapped cloth.
我需要调整的变形时间和仿真参数很多,但我于最终创建了自然和完美拆开布料。
I thought of doing a simulation for the necklace chain paths too, but it turned out it gave me much more control by doing them myself.
我想做一个模拟的项链链的路径,但结果却这给了我作更多的控制,都是通过我自己调整错误。

Hair
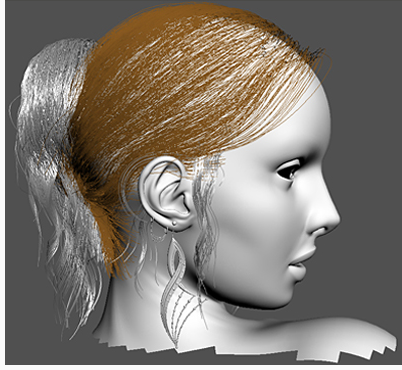
For hair making I used Ornatrix. It has really great way of making hair guides which I personally prefer more than hair that is created in 3ds Max. However, I'm sure this was the last time I used Ornatrix for rendering because it has a very poor compatibility with mental ray. I had to render it separately with Scanline, which caused a lot of problems when I was compositing everything together.
I originally wanted her to wear her hair loose, but in the end I rejected it since it wasn't looking that interesting, and the final style was much better.头发
我用Ornatrix制作头发。它的方式真的很棒可以导板头发,我个人更喜欢在3ds Max中创建更多的头发。不过,我敢肯定,这是我最后一次使用Ornatrix渲染,因为它与mental ray的兼容性非常差。我不得不分开渲染,在我渲染合成所有的时候,这造成了许多问题。
我本来想让她穿她的头发松散,但在最后,我放弃了,因为它没有期待的有趣,最后的方式是更好的。

Texturing
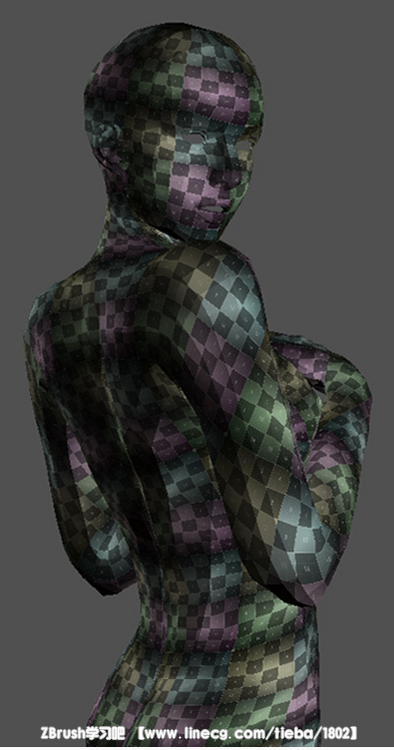
When I started unwrapping her model, I already had a fixed perspective. I decided to unwrap her in a way that all seams wouldn't be seen by the camera. This got rid of the problem about texture blending on seams.
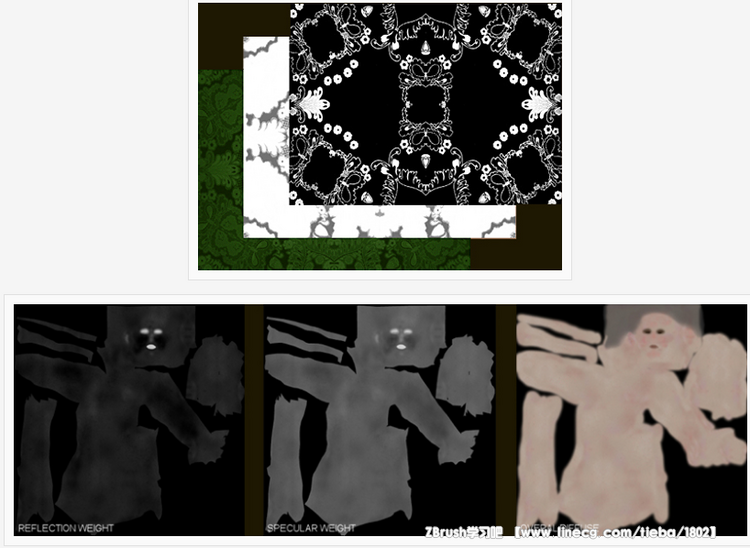
Before starting to paint her skin texture, first I configured the skin shader. Then I began to paint color tones for the skin and her makeup. I detailed it with many brushes putting in imperfections and more realism. I didn't concentrate much on details, because the overall shading was most important to me.
The cloth texture was created by mixing a glossy reflective shader and a standard shader. I also added a fall-off to mimic the cloth look. Also there was an opacity map for some parts to give a lightness to the cloth. I made the texture by repainting various patterns, mixing them together and applying different kaleidoscopes. Since it was pretty much procedural, I could easily make any mask I needed.纹理
当我开始展开她的模型,我已经有一个固定的角度。我决定展开她的方式,所有接缝不会被摄像机看见。这去除了有关在接缝纹理混合问题。
开始画她的皮肤纹理前,首先我配置了皮肤的着色。我开始绘制她的皮肤色调的效果。我没有用更多画笔去详细绘制完美是更加现实的。我没有集中在细节,因为我最重要的是整体的阴影。
布料纹理是由混合一个镜面反射的着色器和标准材质。我还增加了一个脱落模仿布看。也有给一个不透明贴图亮度在布上。我重新绘制各种图案的纹理,混合在一起,并采用不同的万花筒。因为它是相当多的程序,我可以轻易地得到我需要的任何遮罩。

Lighting
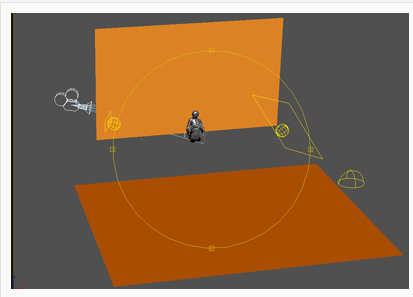
I used two photometric lights for this scene. I had no problems with the lighting setup at all. I was quite certain where I wanted the light sources to be and I was happy from almost the first render test.
Also I used a few planes as reflectors for GI to warm up the overall atmosphere a bit.
照明
为这个场景我用两个光度学灯光。在我所有的灯光设置里没有问题。并且我很高兴首次渲染测试,就确定是我想要的光源。
我也用了几个平面做GI反射预热整体气氛。

Rendering/Compositing
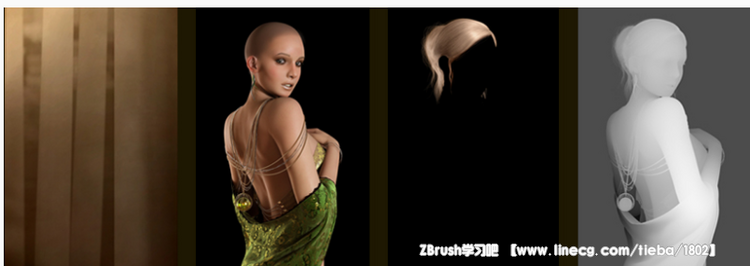
I split rendering into two pieces. One was the hair only and the other was for everything else.
I also had to render a Zdepth pass for each of those two parts too, then compose them together.
渲染/合成
我拆分成两部分渲染。一个是人的头发和其他更多的。
我也有通过zdepth渲染这两部分,然后组合起来。About the artist
My name is Andrius Balciunas. I was born and raised in Lithuania. I got interested in CG at age 16 mainly because of strong influence of video games especially Japanese games and anime. I'm very open-minded to all sorts of art and styles. The desire to make something beautiful is always my strongest motivation for my works.
楼主 2015-08-19 17:59 回复
Copyright © 2010~2015 直线网 版权所有,All Rights Reserved.沪ICP备10039589号
意见反馈 |
关于直线 |
版权声明 |
会员须知
